Scanning and Adding Attachments
External files can be added to the following folders: Patient, Doctor, Drug, Mixture, Group, and Supplier. Documents can be added using the Scan function or from files and images stored on your computer. When a file is attached within a folder, a copy of the file is stored on PharmaClik Rx, rather than as a link to the original file.
A tab identified by a paper clip symbol allows you to access attached documents.
Note: A new patient (or doctor, drug, etc.) must be saved before you are able to scan or add an attachment. You cannot scan or add an attachment for an unsaved, new patient.
Review guidelines below for items that should be attached to specific folders in PharmaClik Rx.
- Patient Folder: Attach clinical reviews, limited use forms, prior approval forms, vacation supplies, and waivers.
- Group Folder: Attach ward stock medication orders, nursing home agreements or related documentation, packing slip print outs, or three month review authorizations. Drug Records Books associated with a specific batch can be attached to the Batch History tab
- Doctor Folder: Attach doctor suspension notification forms, prescriber signatures, doctor notices, and letters.
- Drug Folder: Attach drug recall letters, product monographs, or rebate forms.
- Mixture Folder: Attach master formulation record for drug compound components or product monographs.
- Supplier Folder—Attach letters or notices from the supplier, product catalogue updates. and request for credit forms from McKesson Canada.
Hover your cursor over each field to view a brief description of the functionality.
Note: This image example below is from the Patient folder, however the functionality is the same for the Doctor, Drug, Mixture, Group, and Supplier folders.

When scanning an attachment to the Patient, Doctor, Drug, Mixture, Group, or Supplier folder, a scanner must be installed and physically connected to the workstation that you are scanning at.
When a scanner is correctly installed, the Single and Duplex scan buttons will be enabled and accessible. If a scanner is not installed, the buttons will be disabled.
When scanning a document, the Preview Image window opens to allow you to:
- Scan more pages to the attachment.
- Adjust the image quality of the scanned document/image.
- Rescan pages, if necessary.
To Scan a Document:
- Open the Attachment tab
 .
. - Select either Single Scan or Duplex Scan.
The Preview Image window opens. See Scanning Overview for an overview of the Preview Window.
- Insert the page into the scanner.
Select the Next Image button before inserting the next piece of paper when scanning a multi-page document.
- Make optional image adjustments, see Scanning Overview.
- Select the Accept button.
- The Preview window closes and the Attachment tab opens.
- A new row is added with the most recent attachment appearing at the bottom.
- When more than one page is scanned, all pages are grouped together as ONE attachment and displayed on the Attachment tab as one entry (row).
- Press the Save button to save the attachment to the folder.
- Open the Attachment tab
 .
. - Select Add.
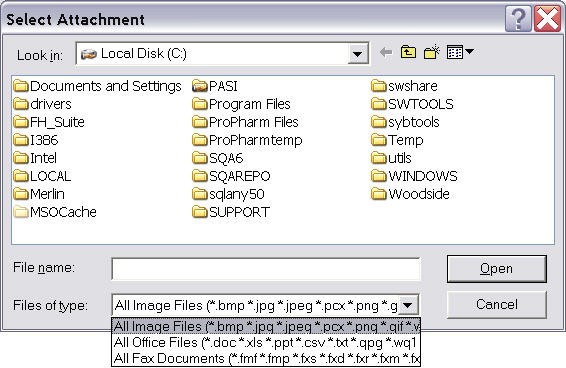
The Select Attachment window opens.
-
Browse for and select an existing file, changing the file type in the dropdown list, if necessary.
You can add the following types of files:
- Image files
- Office files
- Fax documents
- Select Open.
A new row is added to the Attachment tab with the most recent attachment appearing at the bottom.
- The Attachment Description default shows.
To change the attachment name:
- Select a different description from the dropdown list, or
- Type in the Attachment Description field.
- Select Save to save the attachment to the folder.

- Highlight the attachment to be printed.
- Select Print.
The attachment prints.
Note: Office files and Fax document attachments print from their applications. You will notice that the application briefly and automatically launches then closes before the attachment prints.
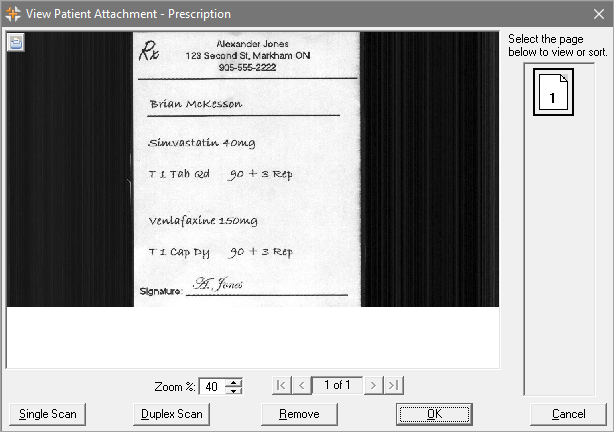
You may view one file attachment at a time. In the View Attachment window, you can view all or part of the image, sort pages in an attachment, and remove pages.
- Select the paperclip icon
 beside the attachment you'd like to view.
The View Attachment window opens.
Note: When viewing scanned documents, as shown in the example above, the View Attachment window opens and the name of the attachment displays in the title bar. For files added from your computer (Office files, Fax files), the associated application launches.
- Use the page navigator
 to view multiple pages in the attachment.
-
Open the attachment as described above in Viewing Attachments
-
Select one of the pages in the pane at the right.
The selected page is surrounded by a border.

- Drag the page to the preferred position.
- Select OK.
The Preview window closes and the Attachment tab displays.
-
Select Save to save changes.
- Open the attachment as described above in Viewing Attachments
-
Select one of the pages in the pane at the right.
The selected page is surrounded by a border.

- Select Remove.
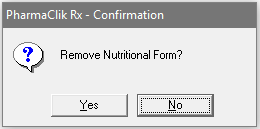
A confirmation prompt displays.
-
Verify that the page number shown is the page you wish to delete.
-
Select Yes to remove page.
- Select OK.
The View Attachment window closes and the Attachment tab displays.
- Select Save to save changes.
- Highlight the attachment to be removed.
- Select the Remove button.
The Confirmation prompt displays with the Attachment Description.

- Select Yes to confirm.
Select No to cancel and close the prompt.


